For today’s post, we will cover an issue that may come up from time to time particularly when you have to support some ancient application that was built on an older version of node.js or more specifically, uses an older version of npm. This will be a walk through on how to update the older versions of npm on Windows.
What is npm?
The error I ran into was one specifically related to updating npm, which is the package manager that comes bundled with the Node JavaScript platform. You can configure npm to use any compatible registry you like but it comes preconfigured to use npm’s public registry by default. Here is a link to the npm docs if you are interested in learning more:
Now back to the problem at hand. I needed to use an older version of node.js with a newer version of npm. My original thought was that I could use npm to update itself. It is a package manager after all and npm is a package.

How to update npm via CLI
This is the preferred method of updating npm. We are essentially telling npm to go ahead and update itself. You will want to open a PowerShell or Bash prompt and type the following command.
npm install -g npm@latest
Note that the -g makes it globally available and the @latest will pull the most recent version however you can use this to target a specific version as well. An example would be running:
npm install -g [email protected]
Unfortunately after running the command above, I was greeted with the error below. Notice the version of npm I am using.

For some of the older versions of npm, this approach is a bit problematic. I found that it does work as intended with the newer versions of npm so this issue seems to only affect the older versions. Using Node.js version 15 and above will allow you to update npm using the commands above since they ship with v7+ versions of npm.
There are several solutions we can take to solve this issue. One suggestion often thrown out is ditching NPM all together and using Yarn, pnpm, Chocolatey or some other package manager.
But what if you are in a situation where you can’t use these tools and must resort to using the default version of npm you are given? My thoughts are also that you really shouldn’t need to use another package manager to manage your current package manager.
Now there may be an easier or automated approach to solving this issue but for the time its worth, here is what I do/did/ and will probably do next time this happens.
If you are following along with my blog, then you should have all your tools conveniently located in one place.

To get a recap on what/how/why we did this, check out this post:
How to manually update npm
Click on the nodejs symlink
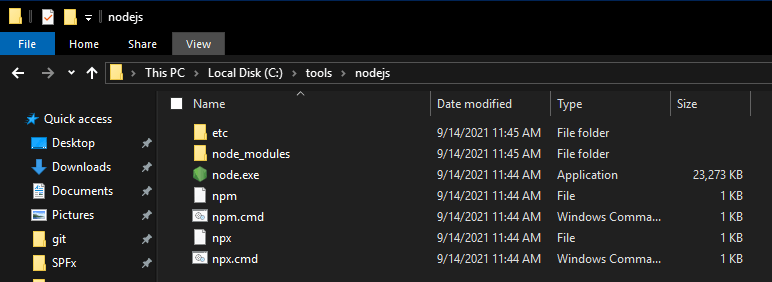
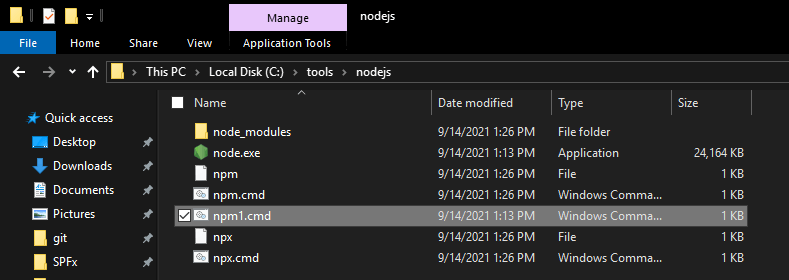
The first thing we are going to do is rename npm.cmd to npm1.cmd (we will use this file later)
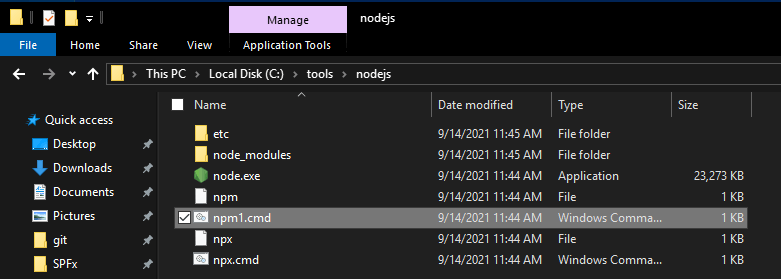
Next we need to delete a few files: npm, npx, npx.cmd (highlighted below)
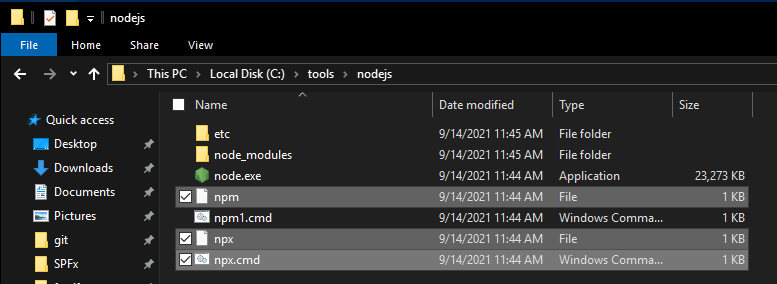
Your nodejs symlink directory will now look like this

Then we are going to run this command (note the npm1 as reference to the file we renamed earlier)
npm1 install -g npm@latest
If it works then great! Problem solved! This was all I had to do the first time I went through this however when I went through the steps for this blog, I encountered a few additional errors which we will address below.
Additional errors
If you get an error like this, you can just delete the .bin folder listed in the error below. Don’t worry, these are files that will be all overwritten once we upgrade npm anyway.

Browse to C:\tools\nodejs\node_modules\npm\node_modules and delete the .bin folder
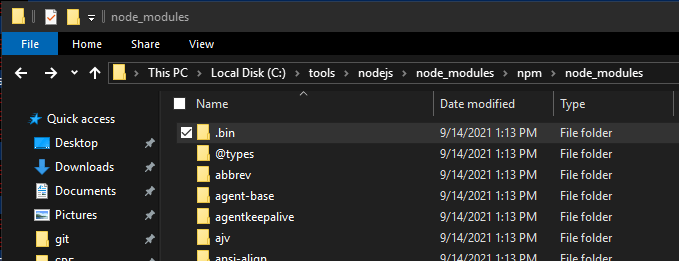
I also received another similar error right after fixing the last one, so we get to delete another .bin folder but this time under the node-gyp directory.

Browse to C:\tools\nodejs\node_modules\npm\node_modules\node-gyp\node_modules and delete the .bin folder

Now we the npm1 install command from before. (You can just push the up arrow and it will save you from having to write out the command again).

A bit of cleanup
You can delete the old npm1 file we used to update npm as it is no longer needed.
Cheers!

